Garden tools and jigs · Guide 118
Make a Planting Dibber with an Adjustable Depth Stop
A blunt wooden planting tool with a removable collar that transfers a chosen sowing depth.
01 / See the shape
View the project

Loading the 3D view…
Drag to turn. Pinch or use + / − to zoom. The written step covers workholding and tool use.

Scroll or swipe the enlarged drawing to read its dimensions. Choose Fit to see the whole drawing again.
The complete tool: a rounded wooden shaft and a removable split collar. Set its lower face from your finished tip using the actual crop instructions.
02 / Plan your build
Before you start
A depth stop is useful when it transfers a crop instruction rather than inventing one. This dibber uses a smooth hardwood dowel with a rounded end and a clamp-on collar. Set the collar from the finished rounded tip and use only in prepared loose growing medium.
Where it goes
Known prepared seed-starting medium or a cleared garden bed; not compacted ground, utility probing or soil of unknown history.
Footprint: The shaft is 1 inch across; the example collar is 1.75 inches across. Actual collar size varies. Leave room for fingers to set and remove it.
What to expect
Supported crosscutting, hand sanding and fitting a commercial clamp collar. Plan 45–90 minutes plus collar selection.
A planning estimate for the hands-on work, once the materials are bought and the tools are set up. It has not been timed on a finished build.
Check the spot
- Known prepared seed-starting medium or a cleared garden bed; not compacted ground, utility probing or soil of unknown history.
- Measure the usable stock before marking. Keep the assembly area flat and large enough to clamp the work without reaching across a moving cutter.
Stop and check first if…
- Stop if the collar slides, the dowel splits or the tip meets a stone. Do not tighten harder onto damaged wood or use the shaft as a pry bar.
- Do not copy the 2-inch drawing example as crop advice. Use the sowing depth for the selected crop and verify it in the actual loose medium.
Work safely
- Hold the round dowel in a clamped V-block for crosscutting. Round the tip with the tool supported, keeping abrasive dust out of the growing medium and inspecting for splinters.
- Keep fingers clear when joining the collar halves, and secure small screws away from children. Use light hand pressure in known loose growing medium only; never probe for utilities or force the tool against stones.
Budget
We have not put a price on this one yet. Lumber and hardware prices change by store and season, so price the list under What you need at your local supplier before you buy.
03 / Gather and cut
What you need
D — Blunt dibber shaft
1 piece
Straight smooth 1-in-diameter untreated hardwood dowel. One 12-inch or longer clean length, yielding 10 inches plus kerf.
Cut list uses bounding 1 × 1 section; actual part is round with a hand-rounded tip.
C — Clamp-on depth collar
1 piece
Two-piece clamp-on shaft collar with 1-in bore and smooth exposed hardware; reference 1.75-in outside diameter and 0.5-in thickness. One collar measured to the actual dowel; use its supplied clamping screw.
No setscrew point driven deeply into a split dowel. Keep the clamp removable.
Depth labels
1 item
Fine durable marker for the selected depth lines measured from the finished tip Buy one fine waterproof marker suitable for dry hardwood.
Write the crop/use setting, not an unsupported universal seed-depth claim.
Fine abrasive
1 item
Abrasive suitable for hand rounding the tip and smoothing the shaft Buy one sheet of fine abrasive suitable for smoothing the actual hardwood by hand.
Wrap around a small sanding block or use by hand with the dowel supported; no drill or screw-driving directions apply.
Cut list
| Piece | How many | Cut length | Note |
|---|---|---|---|
| D — Blunt dibber shaft | 1 | 10 × 1 × 1 in | Finished length × width × thickness; square ends unless the detail says otherwise. |
Tools
- Rule, square, pencil and fine marker
- Clamps and sacrificial support for a short dowel
- Fine hand saw suitable for the supported dowel
- Fine abrasive and the collar’s specified hand tool
- Small sanding block; a flat board for setting the rounded-tip reference
Protective gear
- Eye protection for cutting and sanding
- Dust collection or material-appropriate dust protection during sanding
- Closed footwear; no gloves near a moving cutting edge
04 / Put it together
Build steps
- 01
Read the actual sowing instruction
Choose a specific crop and growing method and write down its required planting depth. Do not copy the 2-inch drawing setting unless the actual crop instructions call for it.
Close-up · Whole model shows the complete partLoading the 3D view…
Drag to turn. Pinch or use + / − to zoom. The written step covers workholding and tool use.
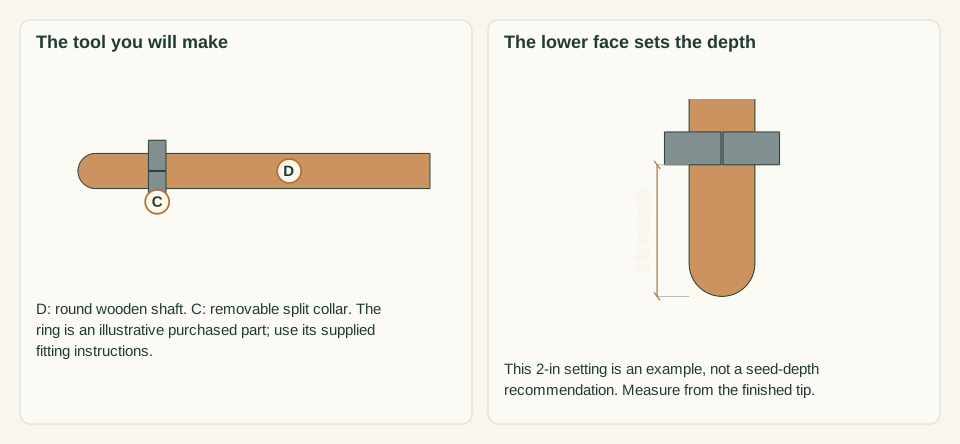
Scroll or swipe the enlarged drawing to read its dimensions. Choose Fit to see the whole drawing again.
The complete tool: a rounded wooden shaft and a removable split collar. Set its lower face from your finished tip using the actual crop instructions.
Check: A real crop instruction supplies the intended depth.
- 02
Inspect the hardwood dowel
Measure diameter at several points and check the entire 10-inch working length for splits, knots or chemical exposure. Select a two-piece collar that fits that measured shaft without a large gap.
Close-up · Whole model shows the complete part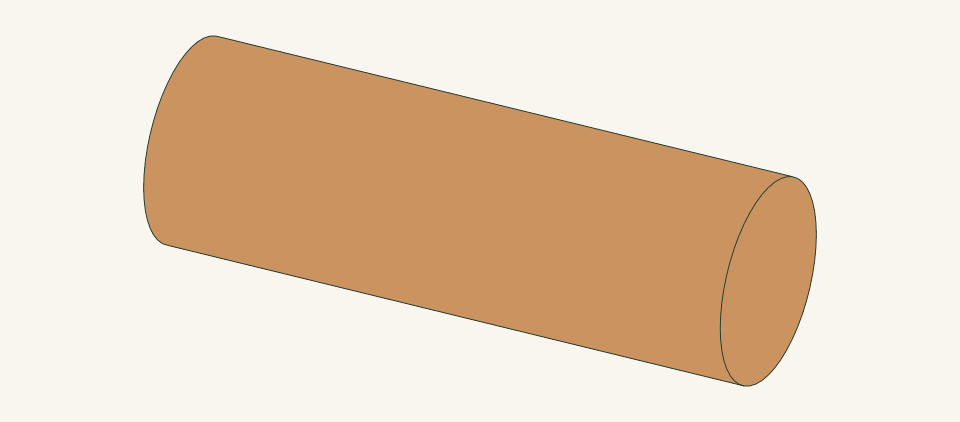
Loading the 3D view…
Drag to turn. Pinch or use + / − to zoom. The written step covers workholding and tool use.
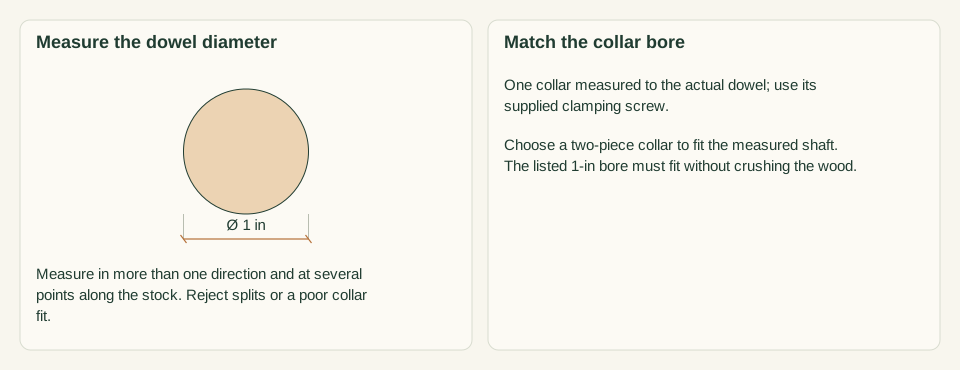
Scroll or swipe the enlarged drawing to read its dimensions. Choose Fit to see the whole drawing again.
Check the actual round stock and choose a matching collar before cutting. A 1-in bounding square is not the dowel shape.
Check: The shaft is sound and the collar bore matches its actual diameter.
- 03
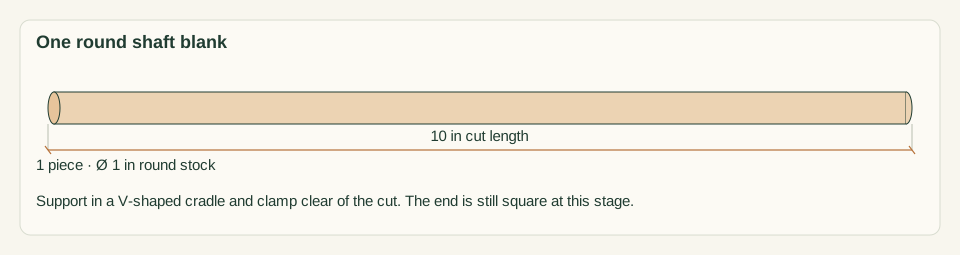
Cut a supported 10-inch blank
Clamp the dowel in a stable V-shaped support or equivalent cradle with the cut clear of clamps. Crosscut on the waste side and keep the short offcut controlled without trapping the saw.
Close-up · Whole model shows the complete part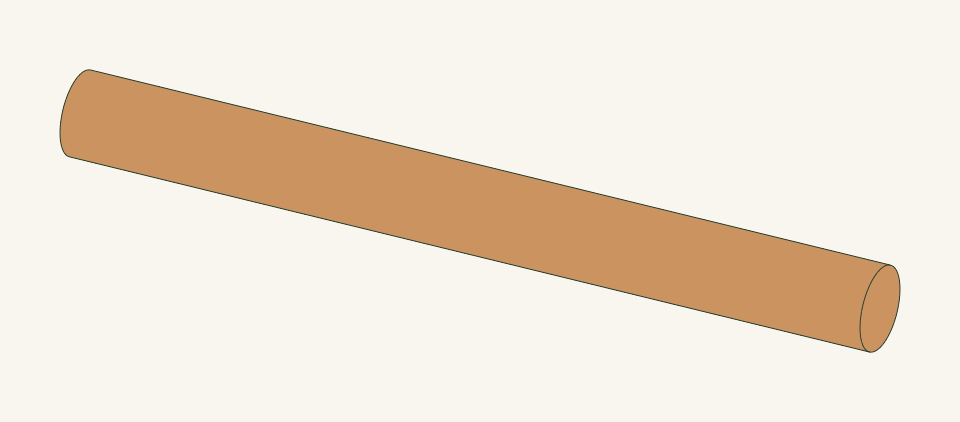
Loading the 3D view…
Drag to turn. Pinch or use + / − to zoom. The written step covers workholding and tool use.
Scroll or swipe the enlarged drawing to read its dimensions. Choose Fit to see the whole drawing again.
Cut one 10-in round blank with the work supported. Keep the saw kerf on the waste side.
Check: The blank is square-cut and has no crushed or split end.
- 04
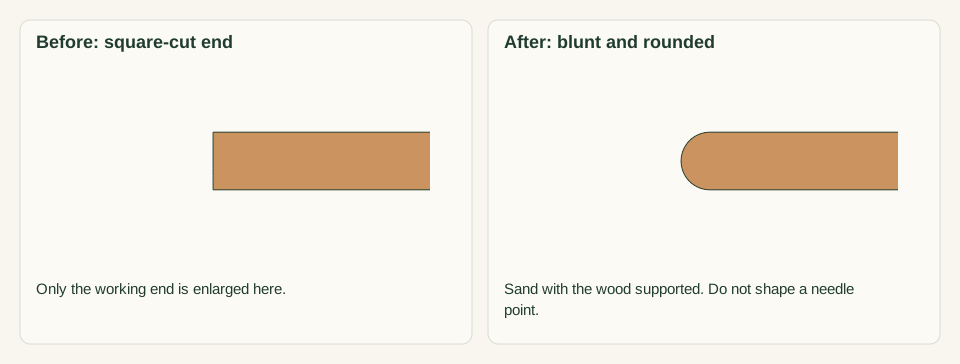
Round the working tip by hand
Ease one end with fine abrasive into a blunt rounded tip. Do not make a needle point or carve toward an unprotected hand. Smooth the transition so the tip presses loose medium without snagging.
Close-up · Whole model shows the complete part
Loading the 3D view…
Drag to turn. Pinch or use + / − to zoom. The written step covers workholding and tool use.
Scroll or swipe the enlarged drawing to read its dimensions. Choose Fit to see the whole drawing again.
Before and after hand-rounding: remove the sharp end edge, leaving a blunt, smooth working tip. The illustrated curve is not a required radius.
Check: The tip is blunt, smooth and free of cracks or splinters.
- 05
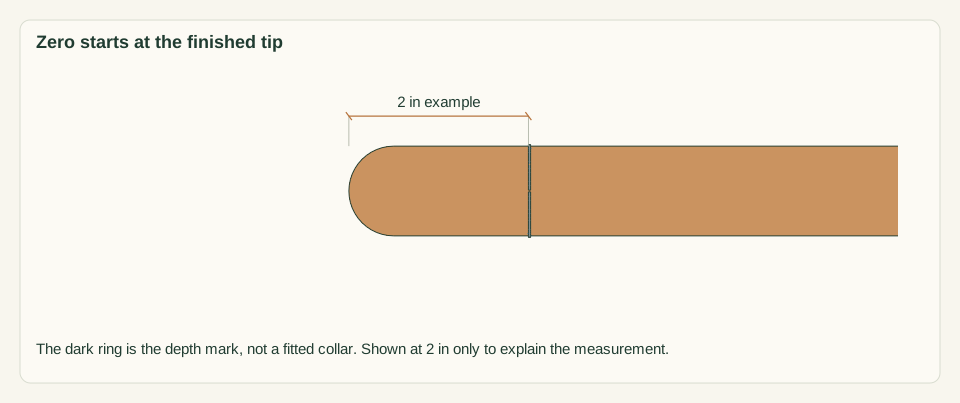
Measure from the rounded tip
Stand the newly rounded tip on a flat board. Measure up the side from the exact point touching the board and mark the chosen planting depth. Keep the rule straight beside the shaft. Do not measure from the old square shoulder or from the collar upper face.
Close-up · Whole model shows the complete part
Loading the 3D view…
Drag to turn. Pinch or use + / − to zoom. The written step covers workholding and tool use.
Scroll or swipe the enlarged drawing to read its dimensions. Choose Fit to see the whole drawing again.
Put the finished tip on a flat reference surface, then measure to your chosen depth. Mark the shaft before fitting the collar.
Check: Every depth mark is referenced to the actual rounded tip.
- 06
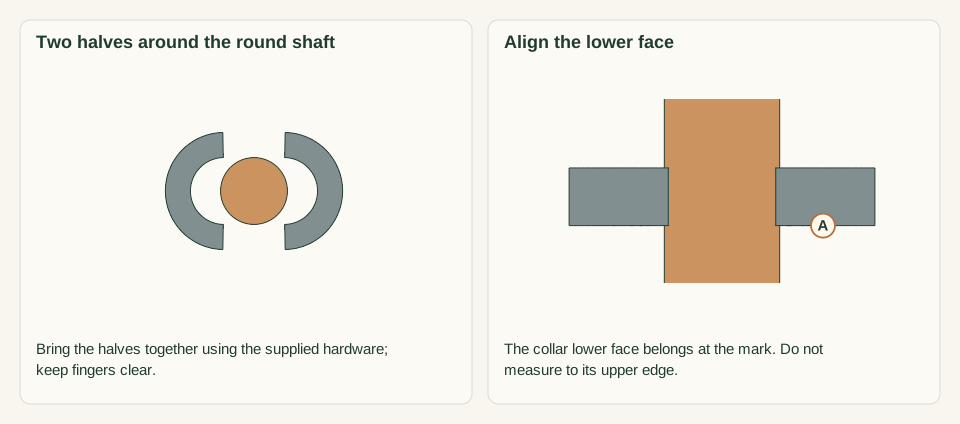
Fit the collar loosely
Separate and refit the two collar halves around the shaft using the supplied hardware. Keep fingers clear as the halves close. Position its lower face at the selected depth line without clamping yet.
Close-up · Whole model shows the complete part
Loading the 3D view…
Drag to turn. Pinch or use + / − to zoom. The written step covers workholding and tool use.
Scroll or swipe the enlarged drawing to read its dimensions. Choose Fit to see the whole drawing again.
Bring the two collar halves around the shaft at the mark. The enlarged separation shows how the halves fit; it is not an installation gap.
Check: The collar sits square and its lower face aligns to the intended depth.
- 07
Clamp without damaging wood
Tighten the collar by its instructions using hand tools. Check that it stays square and does not crush the shaft. Reject a fitting that requires deep setscrew damage or visible splitting to stay in place.
Close-up · Whole model shows the complete part
Loading the 3D view…
Drag to turn. Pinch or use + / − to zoom. The written step covers workholding and tool use.
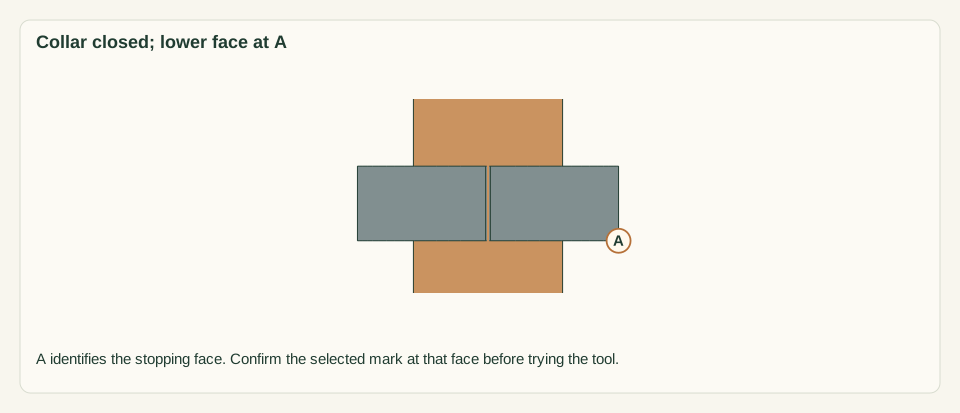
Scroll or swipe the enlarged drawing to read its dimensions. Choose Fit to see the whole drawing again.
Close the collar square to the shaft using its own instructions. It must grip without crushing, splitting or a deep setscrew mark.
Check: The collar is secure and the wood remains undamaged.
- 08
Check depth in a practice medium
Use known loose practice medium. Push only until the collar’s lower face touches the surface, then withdraw straight. Check the mark against a rule and adjust the collar if settling or its tilt changes the result.
Close-up · Whole model shows the complete part
Loading the 3D view…
Drag to turn. Pinch or use + / − to zoom. The written step covers workholding and tool use.
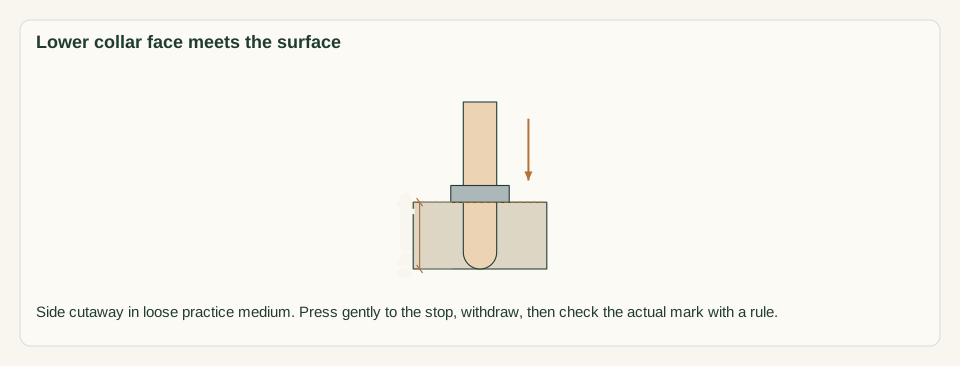
Scroll or swipe the enlarged drawing to read its dimensions. Choose Fit to see the whole drawing again.
Practice in known loose medium. Stop at the collar’s lower face, withdraw straight, and measure the result before sowing.
Check: Repeated marks match the intended depth without excessive force.
- 09
Use in prepared growing medium
Place the dibber at each selected seed position and press gently to the stop. Do not twist hard against stones, search for services or force it into compacted soil. Sow and cover according to the crop instructions afterward.
Close-up · Whole model shows the complete part
Loading the 3D view…
Drag to turn. Pinch or use + / − to zoom. The written step covers workholding and tool use.
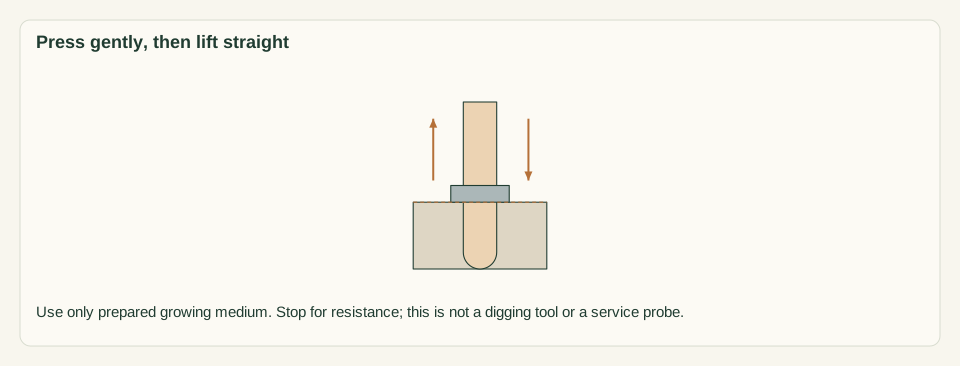
Scroll or swipe the enlarged drawing to read its dimensions. Choose Fit to see the whole drawing again.
Use the checked setting only for the selected crop. Press to the lower face and lift straight out without twisting against stones.
Check: The stop does not slip and the tool is not being used as a ground probe.
- 10
Clean and store the setting
Brush soil from the tip and collar, dry the shaft and record the setting for its actual crop. Loosen or remove the collar for storage if its maker recommends it. Inspect for splits before the next use.
Close-up · Whole model shows the complete part
Loading the 3D view…
Drag to turn. Pinch or use + / − to zoom. The written step covers workholding and tool use.
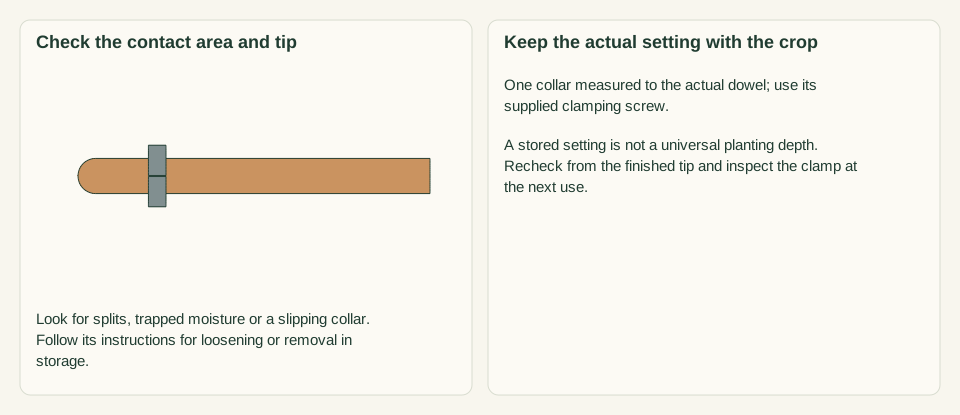
Scroll or swipe the enlarged drawing to read its dimensions. Choose Fit to see the whole drawing again.
Brush off soil, dry the shaft and collar, and recheck their condition before the next use. Retain any removed small hardware.
Check: The rounded-tip reference and collar grip are checked again before the next use.


05 / Keep it sound
Care
After the build
- A depth stop transfers a chosen measurement; it does not choose crop spacing, germination conditions or seed covering.
- Keep the collar and its small screws away from children; store the tool without a sharp or loose protrusion.
Check it each season
- Brush soil away, remove trapped moisture around the collar and dry the shaft. Recheck the actual tip-to-collar distance and clamp grip before each use.
- Replace a split or crushed shaft; do not repair a damaged collar seat by driving a setscrew into it. Store the collar and small screws securely.
If something looks wrong
- Collar slips
- Stop, clean the shaft and inspect fit; do not keep pressing deeper than intended.
- Depth is inconsistent
- Measure from the actual tip and check collar tilt and the practice medium’s surface.
- Tip catches a stone
- Stop and use an appropriate soil-preparation method; do not pry with the dowel.
- Shaft cracks below the collar
- Replace the shaft and reassess collar fit instead of tightening harder.
Keep exploring